![]()
![]()
![]()
![]()
Marquee
Instead of using the rubber, you can substitute the pixels in a rectangular area more quickly. Choose the tool by clicking on the leftmost tool button on the control panel:
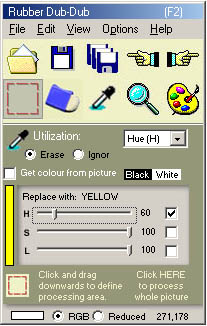
The mouse cursor will change into a cross. To define the rectangle, click the left mouse button down on the picture where you would like to begin the top left-hand corner, and, still holding the button down, drag downwards to the right. When the rectangle is the size you want it, release the button:
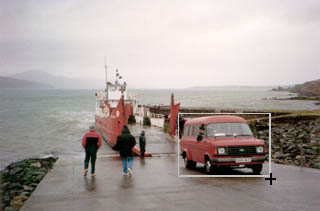
Photo: www.freeimages.co.uk
The pixels will then be replaced within the rectangle:
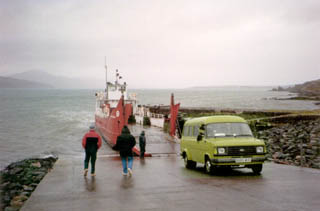
But you should bear one thing in mind. In the example above, all the pixels within the rectangle had their hue changed to yellow, including some parts of the wall behind the car*. However, this is hardly noticeable. But had the replacement colour been blue or some other colour in distinct contrast to the hue of the wall, then it would stick out like a sore thumb. In this case, you would choose not to use the marquee at all, but to use the cutout tool (probably Type 2).
[* Although it is not shown here, the dropper was set to replace the hues of the entire 0-359 range, i.e. all existing hues. But this is not necessarily the case. If you can set up the H, S or L parameters of the dropper in such a way as to select out the body of the car from the background wall, then the wall will be untouched by the marquee replacement (i.e. not changed to yellow hue).]
Related Topics: