![]()
![]()
![]()
![]()
Dropper Tool
Whichever work template you are using, you will always need to study the HSL colour content of your picture in order to decide which pixels should be substituted and which pixels should not. You will be particularly interested in knowing what values of H, S or L constitute what you describe as a single colour (e.g. "light red"), i.e. you need to know what HSL ranges you are dealing with. The most useful tool on the Control Panel for this purpose is the dropper tool which can be used together with the (invisible) "Range Grabber":
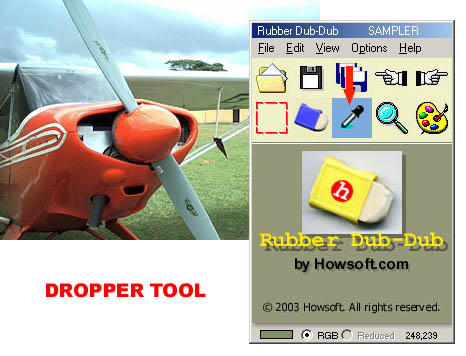
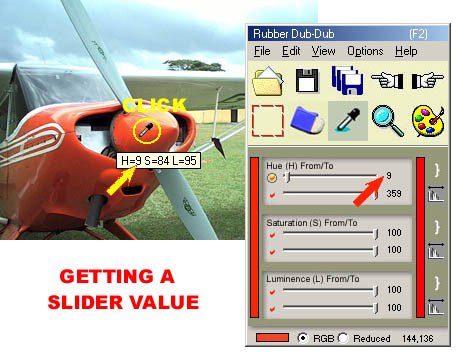
Whenever you click on the dropper tool button, the following display appears:
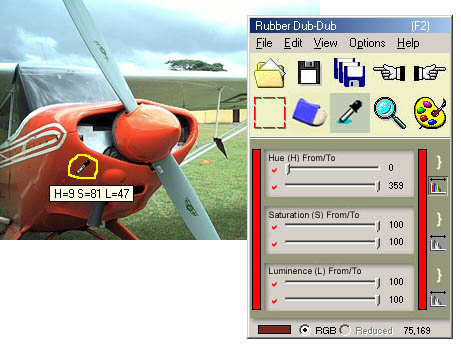
Note immediately that as you move the mouse over the picture, the cursor has changed into a dropper and that the values of H, S, and L for the pixel at the point of the dropper are shown. Moving the mouse over the picture causes these values to change accordingly. The values shown on the dropper panel before the dropper has been used are always the same, so if you wish to use these default values, you don't even need to go to the dropper to set them. Initially, the H range is set to 0-359 (i.e. all the colours), the S range is set to 100-100 (i.e. 100 only - maximum), and the L range is set to 100-100 (maximum). The pairs of sliders represent the "From/To" values. On the right, you have 3 "range maximizing" buttons, the first of which is coloured. The fact that it is coloured shows that the H range is set to the greatest extension possible, i.e. all the hue values from 0 to 359. If ever this button is not coloured, and you click on it, the range values of H will be set to (0-359) and the button will become coloured. The same goes for the S and L ranges, except that the values are different to H. If you click on the S or L range maximizing buttons, the slider values will change to (0-100):
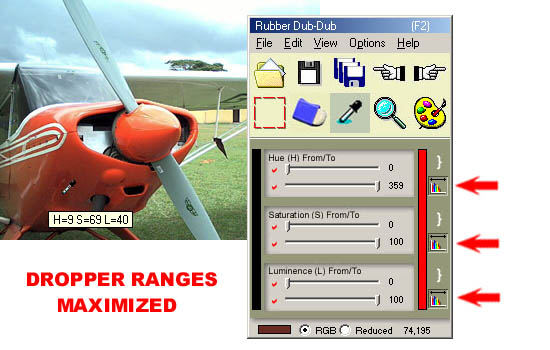
Note also the change in the colour displays. The "from" colour in the narrow vertical box on the left was initially red at (0, 100, 100) with the "to" colour in the narrow vertical box on the right at (359, 100, 100) which is almost indistinguishable. Reducing the saturation and luminance to 0 produces black. (In fact, whatever the values of H and S are, black is still produced if L = 0.)
To get a value from the picture, select the appropriate slider by clicking on the left-hand-side "tick", and then click on the picture itself. For example, if you want to get a value for "H From", choose the slider:-
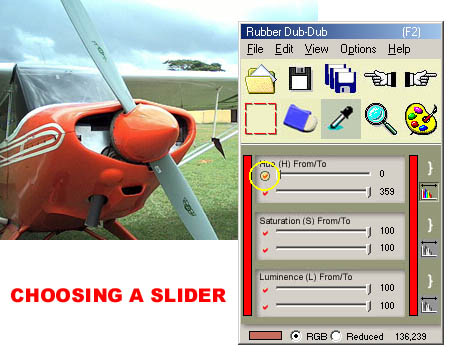
- and then click on the picture:
You can do the same thing for each of the 6 From/To sliders in relation to H, S and L.
There will be occasions on which you will want to define "null" ranges, i.e. where the "From" value is identical to the "To" value. In this case, just select the "brace" button on the right (note that it turns red). Now, when you click on the picture, the From/To values will be equalized:
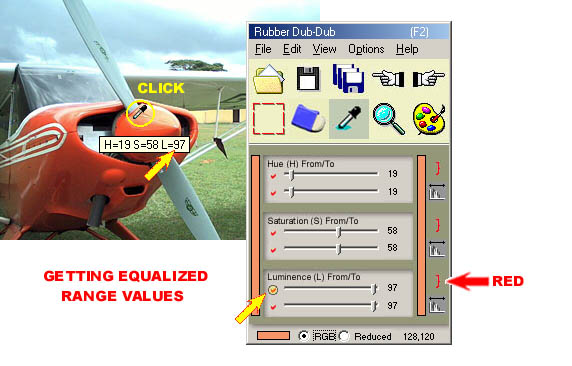
Clicking on the brace button again will turn it off, and it will be shown in white instead of red.
Very often, when you are getting ranges of HSL values on which to base your substitution of pixels, you do not pick up all the numbers in the range accurately. To help you do this, you can use the "Range Grabber" explained in the next section. However, even with the Range Grabber, it is often desirable to extend the range a bit in order to guarantee that you define all the pixels within the area of interest. So for example, you might extend an H range of 10-23 to 5-30. You can easily do this by dragging the sliders with your mouse:
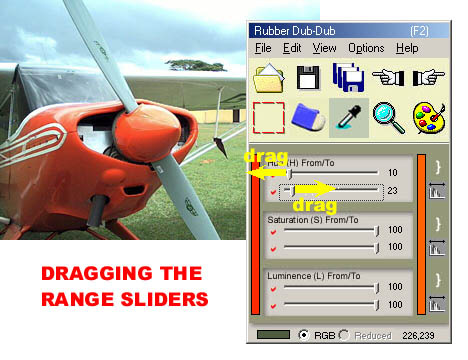
However, the slides are not very wide, and if you have difficulty getting exactly the number you need by dragging, do the following. First of all, make sure that the slider has been selected by clicking on it somewhere. This causes a dotted-line rectangle to surround the slider. Then use the left or right arrow keys on the keyboard to decrement or increment the slider number to the desired degree:
![]()
RELATED TOPICS: