![]()
![]()
![]()
![]()
Making Your Own Palette
The first thing to do is to decide what colours should constitute your palette and what names you would like to give these colours. Before you start, please note that 180 is the maximum number of colours you can create in an RD-D named colour palette, but you can create a palette with fewer colours if you want to. The RD-D default palette itself uses only 173 colours.
If you have a series of pictures which collectively contain all the colours of your intended palette, then you can use these if you wish, but it is not the most convenient method. You will easily see how to do this after you have received the following explanations. However, the easiest and more orderly way to create a new palette is to collect your colours together in a single picture, together with their names. For example:
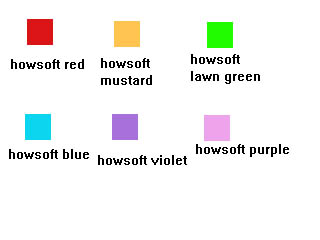
The layout need not be a matter for concern, as this picture will not be used in the program. The format of the original palette picture can be BMP, GIF or JPG, but BMP is recommended for this purpose.
Step 2 is to load this picture up into RD-D. However, when you get to this dialogue:-
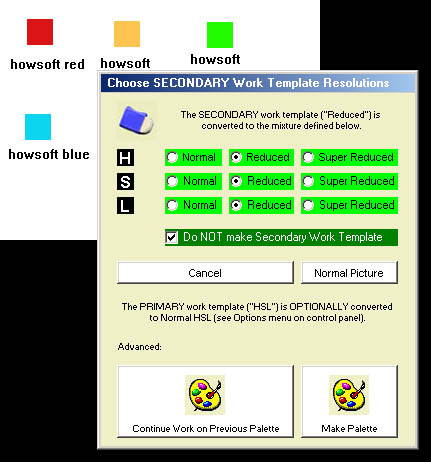
- click on "Make Palette" at the bottom. You will then be presented with a control panel of the following layout:
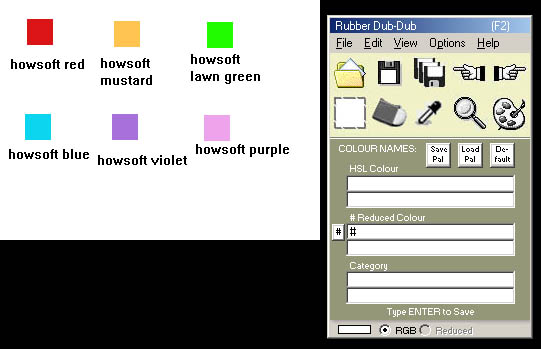
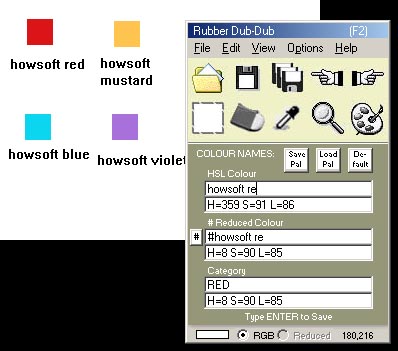
Click on a colour in your picture (say the first one - howsoft red), and you will get the following:
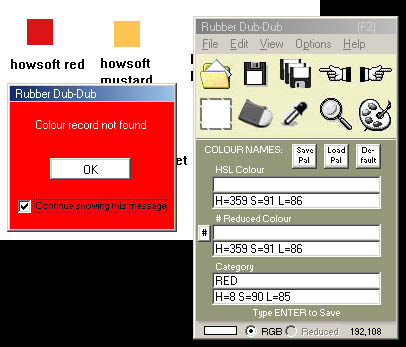
Of course, the "colour record is not found" because you have not created it yet! Note as well that text boxes 1 and 3 are blank on the control panel. Click on the red window's "OK" button and the focus will be transferred to the first control panel text box for you to enter the name of the colour. As you type, this same name will automatically appear in text box 3, but with a hash (#) sign before it. This is the name to be given to the "reduced" version of your colour, which is necessarily the same as that of the HSL colour above it:
When you have finished typing the name of the colour, type ENTER to save it (you will hear a "ding" which confirms this):
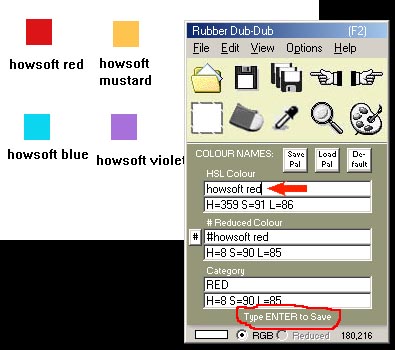
Repeat the same procedure for all the colours of your new palette. If the appearance of the red reminder window for "colour record not found" bothers you, click on the check box provided to suppress it.
As a final check, you can click on all the colours again to make sure that the records have been saved provisionally. If so, all the details should appear in the control panel and the little red window should not appear at all. When you are satisfied that all the colour records have been created, you need to save the palette. Click on the "Save Pal" button to save a backup copy of your palette in a safe place on your HD (see details in Save New Palette).
Even before you save your palette as backup though, it is ready for use. Exit the program and enter again as you normally would to "rub" a picture. If you ask for a named colour, the palette you get to choose the colour from will be your own, rather than the default palette as before. However, if you do not want to use your new palette immediately, just make sure you have saved it and then put the default palette back again by clicking on the "De-fault" button of the control panel.
Related Topics: