![]()
![]()
![]()
![]()
Ill-Defined Objects
Some pictures, particularly photographs, contain objects whose HSL characteristics are numerically difficult to distinguish from their background or surrounding objects. This means that you cannot easily use the dropper tool and rubber to do replacements. The objects in some pictures are a little ill-defined in this respect. In other pictures, the objects are extremely ill-defined. However, none of this means that there is any practical difficulty involved for RD-D, since other tools are at your disposal.
The most generally-useful of these tools is the Cutout Type 2 eraser. In the following pictures, there are a number of ill-defined objects, but by using Cutout 2 (without even using the dropper) we are able to substitute their colours in a jiffy. And since we are replacing the hue component, there is little or no visual evidence of ragged edges or any other nasties.

In this picture, the blue of the propelling pencil is not easily distinguishable from the blue of the background. So you have 2 options. You can either use another component (e.g. luminance) to try to make the distinction, or you can go directly to Cutout 2 and ignor the dropper completely. With the cutout tool, just choose your substitute colour and then draw an outline around the pencil. No hassle!
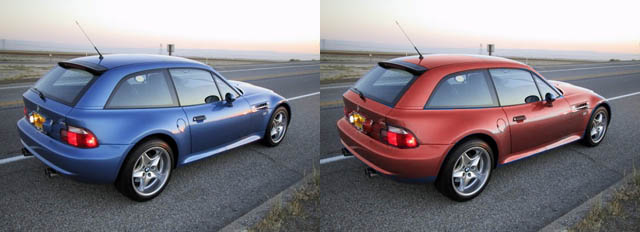
This will take you a little longer than the previous example of the propelling pencils, but not much longer. The area around the car is not all very dark, and parts of the car itself, such as the rear lights and the windows, need to be preserved. I recommend using the Cutout 2 tool again various times on different parts of the car. Then use the zoom to touch up the tiny details with the rubber.
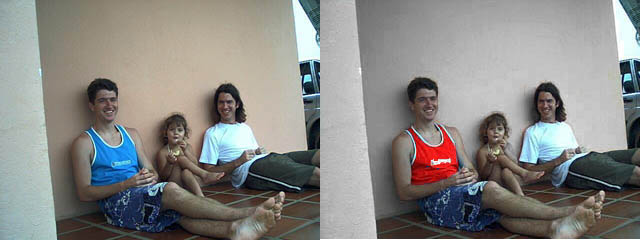
In the above, of course the change to the colour of the young man's T-shirt presents little difficulty with the dropper and the rubber. But if you examine the colours of the floor, the wall, the young man's body, and even the shadow of his arm on the wall, you will see that to distinguish numerically between these objects would be absolute hell! What you do in this case is to get out your Cutout 2 and make the changes to the areas you define with the outline drawn. There's a little work in it, but not much. However, it is worth noting here that whatever changes you make need to be done convincingly. Just try changing the colour of the background wall to light green or blue, for example. The result is not likely to be a happy one. What I did above was to use Cutout 2 to change the wall's colour to greyscale (see What is WHITE/BLACK/GREY). The result is reasonably satisfactory, I think.
As an exercise, you might like to try changing the colour of the floor. If any difficulty exists here at all, it is not so much the technical difficulty of achieving the task as the difficulty of finding a colour which harmonizes with the rest of the picture.