![]()
![]()
![]()
![]()
HSL Ranges
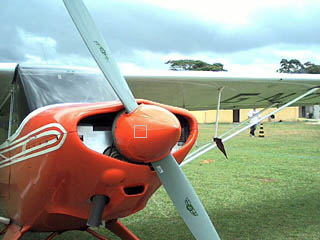
In the picture above, if you want to substitute the red pixels, using the RD-D rubber tool, you can do it by taking care to move the rubber over the red pixels only, using the zoom if necessary.
However, there is a much easier and quicker way of doing this in RD-D, and in this particular picture of the aeroplane you should have no trouble at all. For you and me, knowing what is "red" and what is not "red" is just a matter of looking at it. But for the computer, it is a different story. Instead of plain language, you have to give it numbers instead. If you turn on the dropper tool and move the mouse over the picture, you will be shown these numbers as demonstrated below:
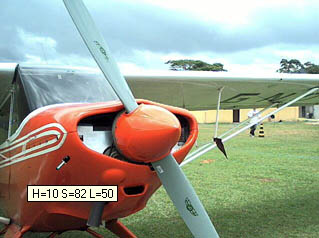
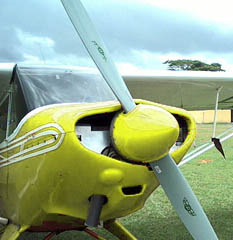
If you are using a 16-million (max.) colour display, using the primary work template (see What is a Template?), you will discover that H = 2-29, S = 11-92, and L = 24-100 (approximately), whereas the grass, for example has values of H = 45-106, S = 27-54, and L = 18-83. If you compare these ranges with one another, it is obvious that while the ranges for S and L have a certain overlap, the ranges for H are entirely distinct. If we are trying to replace the red pixels with blue ones, It is therefore convenient to say to our program "replace all the pixels having an H = 2-29 (reds) with an H = 247 (blue)".

What else surrounds the red of the aeroplane? Well, the grey of the propeller has an H of very roughly 150-200 and the windscreen of the plane has an H of about 180-220. So they are all clearly distinct from the red. You don't need to worry too much about the blackish area underneath the plane, because even if you change its colour accidentally, you will not even notice the difference, since it has a luminosity (L) of almost zero.
As implied above, the way you examine and specify the ranges of H, S and L to be substituted (or ignored) by RD-D is to use the very poweful dropper tool. There is also another important tool which DOES NOT APPEAR ON THE CONTROL PANEL: the range grabber. These and other related topics are shown below.
So the dropper and the range grabber, used together with the primary work template, are your main tools for dealing with photographs. When rubbing photos, you may find some uses for the secondary work template, but you should only use it when the considerable "downgrading" of the colours becomes a distinct advantage. In general, we want to preserve the quality of our photos, and this can only be done with the use of the primary template.
Related Topics: