![]()
![]()
![]()
![]()
ABSOLUTE V RELATIVE SUBSTITUTION
So far, we have dealt exclusively with absolute substitution. This means, for example, that on the level of the individual pixel, you say something like "make the saturation (S) of this pixel 78". What we have not yet dealt with is the possiblity of saying, "Whatever the saturation (S) value of this pixel is, add 15 to it", or "Increase the saturation of this pixel by 15". To find the sliders for specifying such relative substitutions, choose any tool EXCEPT the rubber, and click on the palette button on the right of the control panel:
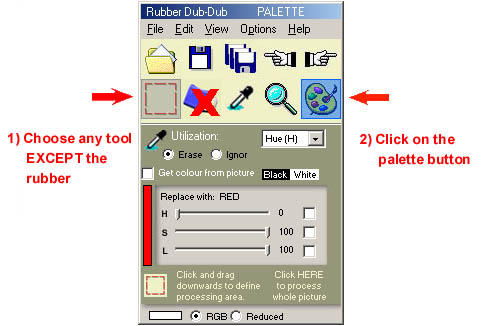
You will then be presented with the relative slider panel:
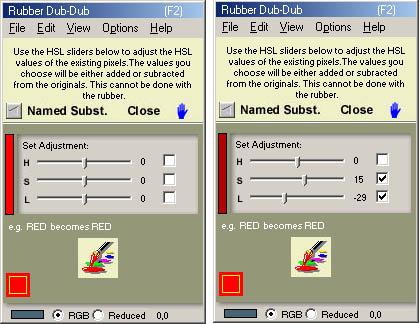
Of course, you can use this substitution panel in conjuction with the dropper, exactly like the absolute substitution panel. But note that the initial slider positions are in the middle at 0. If you move the sliders to the left, you get negative values, and if you move them to the right of the central position, you get positive values. H = -359 to +359, S = -100 to +100, and L = -100 to +100. Just choose the values you want added to or subtracted from the original ones, activate the sliders by means of the check boxes on the right, and click on "close" to return to the tool you were using.
The value you can add to or subtract from a pixel is limited. If your pixel's saturation is 20 for example, and you add 15 to it, you get 35. All well and good. But if your original pixel's value is 90 say, then adding 15 to it gives you 100 (the maximum) and not 105! The same goes for the negative values and the minimum of 0.
So why can't we use this panel in conjuction with the rubber? If you think about it, the answer is obvious. There is no way in which you can easily avoid going over at least some of the pixels more than once with the rubber. Unfortunately, every time you rub over the same pixels, they get the specified values added to or subtracted from them. This way, instead of a mere adjustment to the colour, you would soon be left with pure white or black! Since the other tools do not permit you to process the same pixels more than once at a time, this effect is avoided, unless of course you use the tool again in the same or overlapping place:
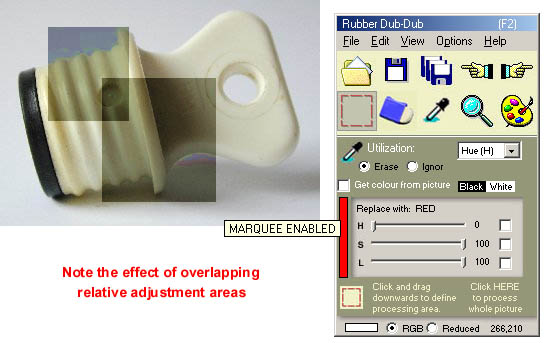
Photo: www.freeimages.co.uk
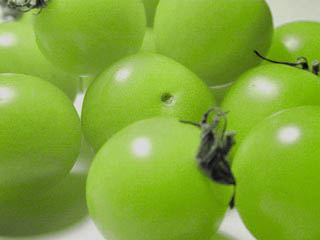
Do you remember this picture of cherry tomatoes from The Kinds of Things You Can Do Easily?
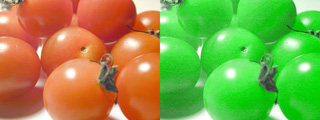
Photo: www.freeimages.co.uk
The green tomatoes are a lovely colour, but they are not very convincing as tomatoes. They look more like plastic grapes! They need to be a little yellower and less bright. Now that you have been shown how, it is very easy to change their green hue a little and use the relative colour adjustment panel to reduce the luminosity by an even amount:
As you can see, the relative HSL adjustment panel gives you the final bit of power you need to change photos convincingly!